Thoughts on disability representation and images
I was thinking this morning about the problems of making images that somehow represent concepts of “disability” in general, activism around disability justice and solidarity, or just wheelchair stuff.
You may recognize the problem. It is a challenge to find cool disability related stuff. If you want 9000 boring variations on the blue disability parking / bathroom symbol, great. But we need to go way beyond that!
In addition to running a nonprofit (Grassroots Open Assistive Tech) and creating logos and cover images for my small press zines, I love stickers and posters and all that stuff. In my backpack and in the side pocket of my powerchair, I carry a little pouch of stickers to give away to people. Some are for my own projects, some are random, some tech related, some fun cartoons or animals for kids. And I like to have cool queer, trans, and disability related stickers to share too!
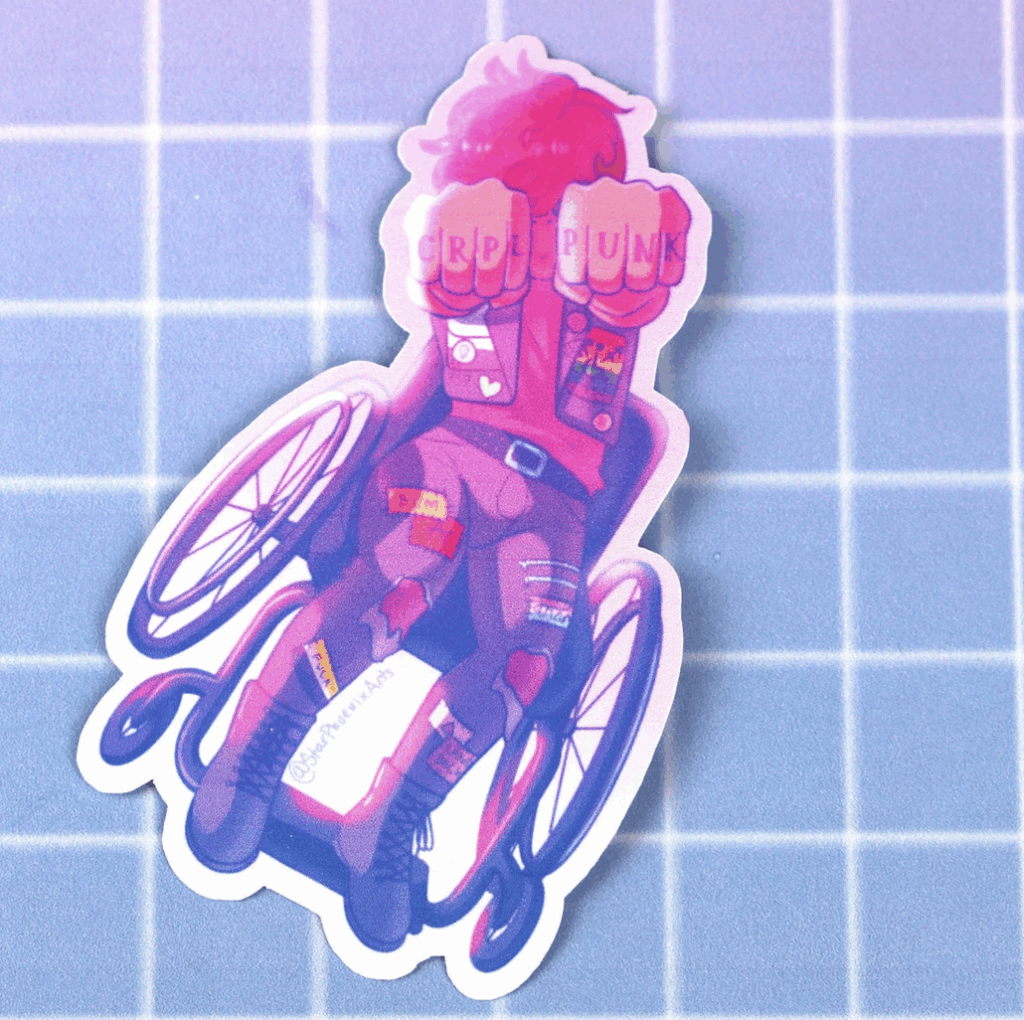
To that end I regularly go trawling through Etsy doing keyword searches like “wheelchair + punk” and see what pops up. “Cripplepunk” is remarkably fruitful! I especially love the dynamic, queer coded pastel knuckle tattoo-ed manual chair “crip punk” sticker from ChaosCripples, and really want that on a tshirt or an iron on patch!
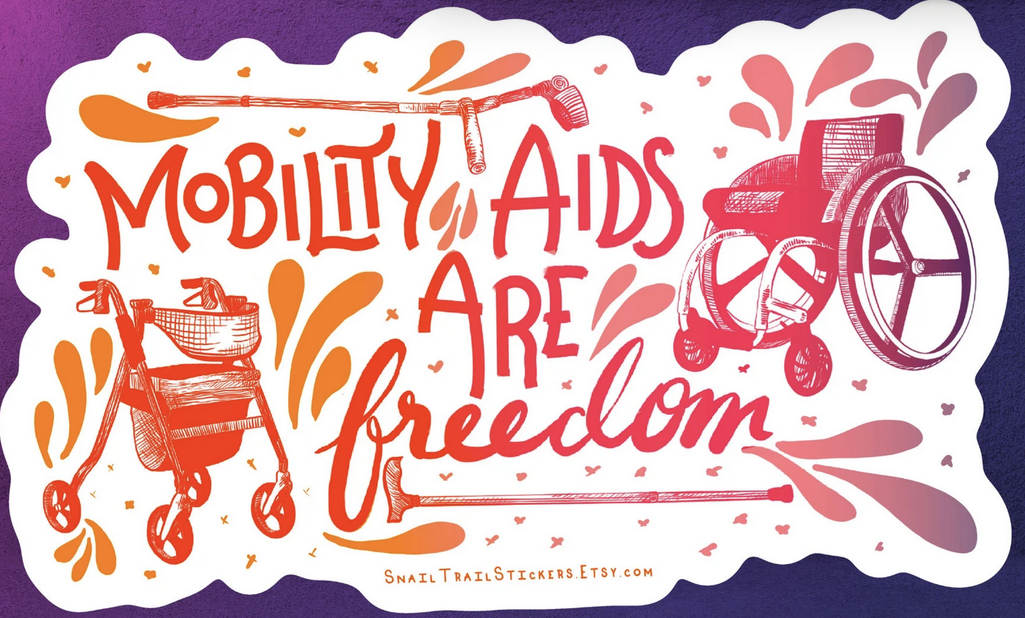
This one is nice too! “Mobility Aids Are Freedom” from SnailTrailStickers!
If you go do some image searches for “wheelchair user” most of what you find will be kind of boring. “wheelchair user punk” used to bring up ALMOST NOTHING but lately, has been kind of good! Some kind of cultural shift (and maybe a technical shift as well) happened for that to be the case.
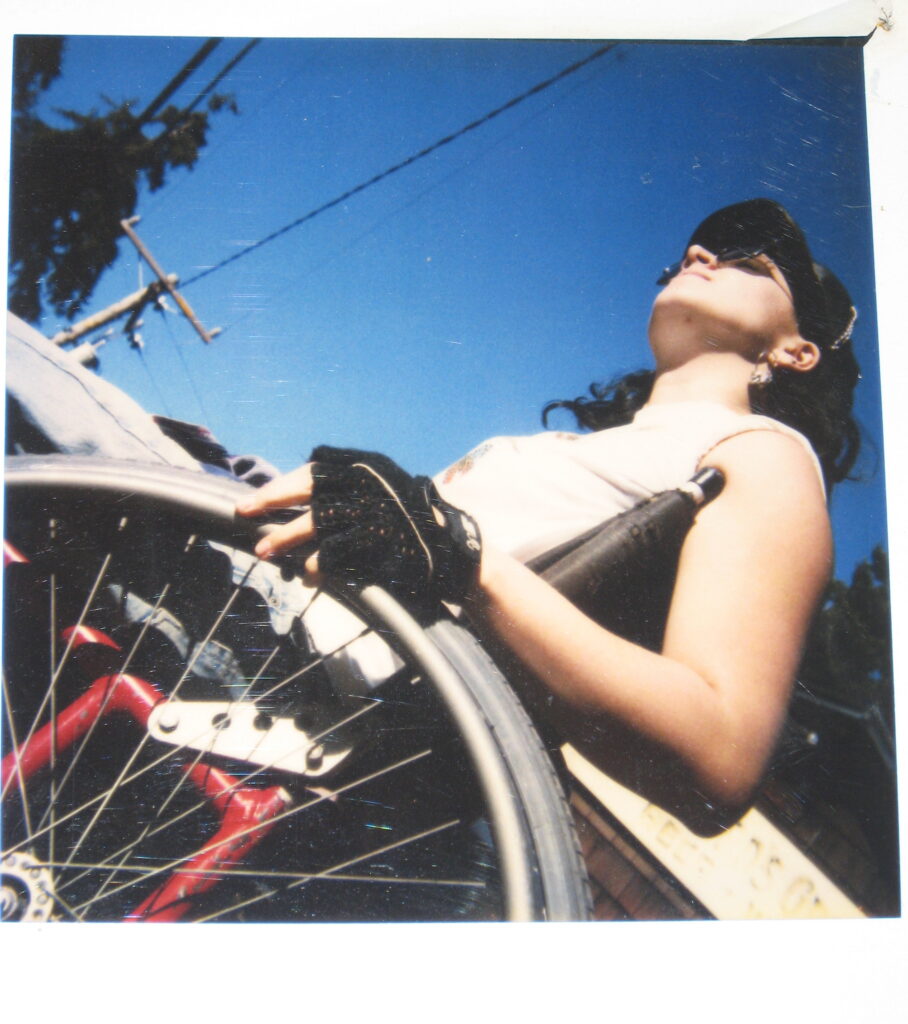
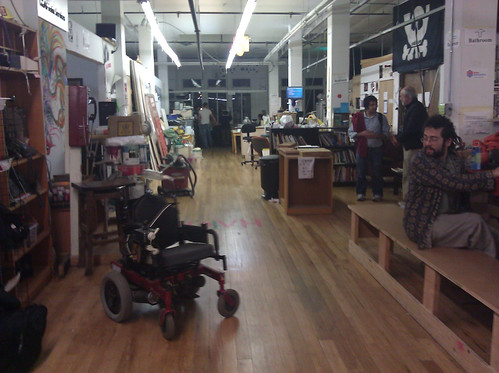
It’s not like we haven’t been around! Witness this pic of me from around 1993 taken by my sister! There was a version of this pic also photoshopped by her to make it look like the wheels are on fire. Note my amazing, youthful wheelchair-given triceps! Anyway I was a punk in a wheelchair and I would have really loved to see any kind of representation at all.
My own drawing skills are OK but have a finicky, scritchy, lynda barryeqsue aesthetic that is not always what I want in a sticker. So I had a try at AI generating images a while back and came up with the seed of the Burn This Press logo I’ve been using on the back of some tiny zines. I lost the prompt but it was something like “nonbinary genderqueer punk, doing a wheelie in a modern dynamic sports wheelchair with electric sparks flying out” (developed over many iterations of bad prompts with bad results). I got something close to the current BTP logo which I then got my sister to re-drew a bit for clean up, and then I did more edits to mess with the hair, neck, lap, leg position, and so on.
Have a look at the Etsy and other online shops where people are making this kind of cool art! Buy their stuff and support them!
I surely have blogged before to lightly mock the wheelchair users we see in murals. They are in a terrible hospital chair, pushed by someone helpful, and everyone is looking up slightly with a beatific smile for maximum Inspo. Barf me out!
(edit: I can’t find that post, maybe it’s in draft somewhere, but here’s an example from the mural by where the J and N Muni trains stop at Church and Duboce. Note the ridiculously transcendent facial expression of this lady despite that she is riding the world’s crappiest wheelchair)
(further edit, i am only mildly cranky about this and like to make fun of things and it is a pet peeve, don’t get me wrong, i also appreciate ANY sort of representation for disabled folks and wheelchair users in particular, because it’s so damn rare)
(Also also, as the CEO of Digression, adding that I can wrench my mind from irritation that the one wheely person in this giant, pretty good and weird mural, is in a crappy chair being pushed, and direct it to the actually good fact that the care worker can also use a representational shout-out? though this is a struggle because what I personally want is a wheelchair user who “looks cool”)

Another problem with disability activism images is trying to represent as nebulous and huge of a concept of disability in one image. Using a wheelchair as this symbol is super lame! j/k!!!
This is how you end up with somewhat awkwardly drawn cartoon people where one is in a wheelchair, someone has a white cane, there’s an older person, somehow they try to work Deafness into it, they will be several different races, someone is in a sari and someone in a headscarf, and so on. Usually they are standing awkwardly around together as if posing for a stock photo! Maybe with protest signs if you are lucky but more often they aren’t doing anything other than Representing. I love this, and it is SO HARD TO DO in a way that looks good, and has some actual solidarity and joy in it rather than coming off as totally cheeseball!
(NOTE: I HAVE POSED FOR THIS PHOTO OFTEN – on request – feel free to put me in your pic – yes, if I work at your company or speak at your event, I absolutely will be in the front row or in your web site photo about Diversity – fuck yeah (but maybe with a little eyeroll))
I think these images, while lovely and well meaning and managing to do Representation, can come off as kind of bad art, or maybe we can be less snobby and call it folk art style, but I wish for artists who can draw the anatomy of human beings more competently than I can, to have at it on stickers, murals, tshirts, posters, logos, you name it. I want some cool socialist realist art of this Representation Group! Some art nouveau dandy versions ! Be in a park! Go to a music show! Be playing dungeons and dragons! Be doing something, omg.
Really the main problem is that none of these Group Photo Representation images, no matter how nice, work super well as logos as they are complicated and you have to draw a lot of bodies and faces and a background. When they are the best (to my mind) they become much more like narratives than logos! And that is good actually! That means they are MORE TRUE.
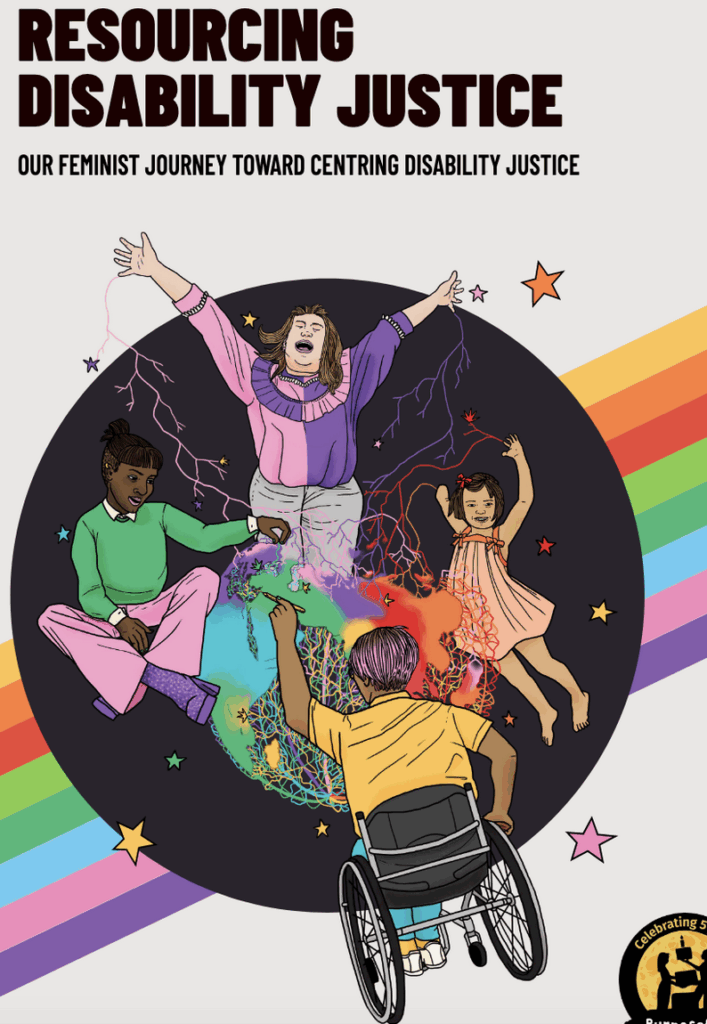
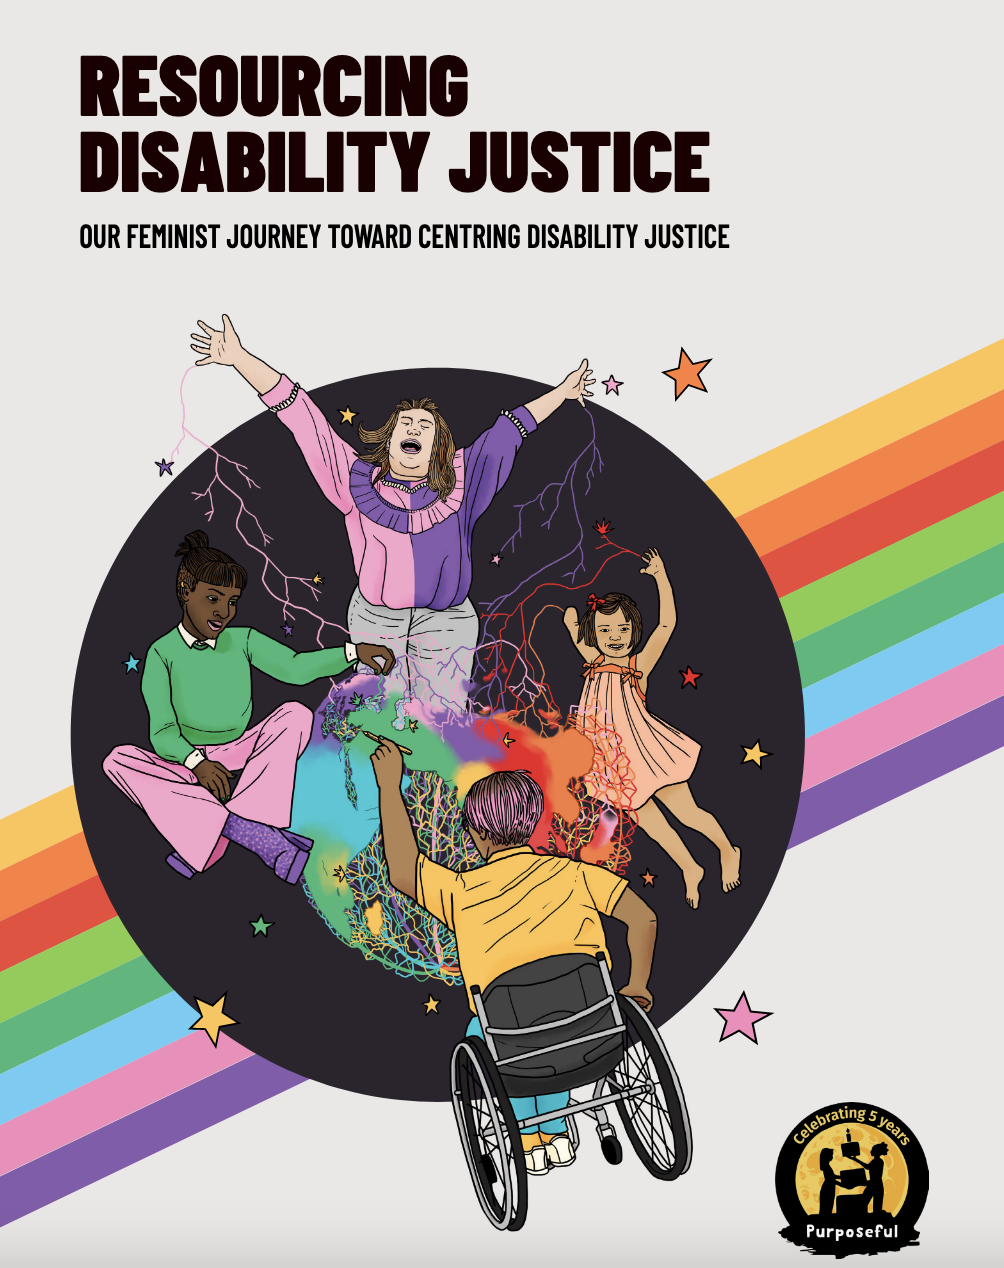
Here’s a pretty good one I found while writing this article from a report called “Resourcing Disability Justice: Our Feminist Journey Toward Centering Disability Justice“! These disabled people are having an ecstatic experience while feministly weaving together, and also representing some kind of super punk-ass rhizomatic concept, in space, on top of a damn rainbow! You see that it is trying to solve all the problems I describe in this single image. It is OVERCLOCKED. Really quite a challenge. Actually, my deep respect to everyone who has tried to meet this challenge, and a shout out to this artist, Abi Stevens!
(Note this report title is ALSO doing the most! “Toward” implies a proper humility, in that you are not done, or objective, or definitive, you are adding your little yawp to the collective chorus over time! We aren’t even defining or creating, we are Centering it. It’s also so disability justice that it has to say it TWICE.)
Another option is to have something kind of abstract – but what ?! I like ADAPT’s burst chain, in this category! There are many that are just like, a shape, or some shapes together, for maximum safety and boringness and when I see those I always imagine the ten painful committee meetings that produced them via painful hashing through everything else I just described. Thus, you may imagine me for years muttering “Oh, look, a SHAPE” and snorting to myself, whenever I encounter these logos, a mutter and snort that should be taken to convey the entire contents of this blog post, but 30 years of it.
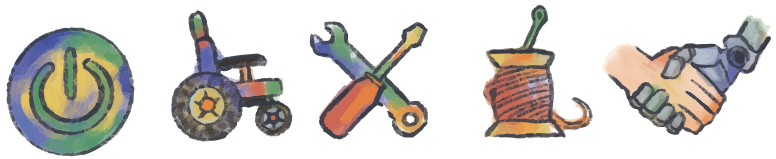
For GOAT I worked both with poking some AI generators and also paying a friend who is a graphic designer to walk through a bunch of these concepts. Rather than human figures I thought it might be nice to have cute, colorful little icons of tech things. That way we get the variety of cross disability solidarity and the idea of tech stuff. The DIY vibe that I was going for is like the whole earth catalogue, sierra club how-to, 70s-ass hand drawn illustrations you might have in a step by step DIY instruction. So, my human designer drew me a whole set of icons, and I am combining and using them in different ways. There isn’t really a canonical “logo” yet but maybe one will evolve as I play with these images! I went with a tablet or ipad looking thing for AAC, a stylized ear with hearing aid and sound waves, and so on. The gear and tools, rather than the people.
I was also going to say a word about stickers and patches and posters. They are usually very hand made and “folk art” feeling, they may or may not have “good” production values ie they may look a bit shitty or like they were created by raccoons in a back alley. That is fine actually. But what we want in our punk stickers etc. is a clear message that is legible to both our in group (other punks) and maybe to a lesser degree to our out groups (especially if we are telling them to fuck off). There’s a lot more I could say about that!
And the point of having these cool ass stickers to give to people is to bring joy to them unexpectedly – there is something so nice about, another disabled person complimenting my stickers a little bit wistfully and then I pull out a whole sheaf of stickers they can pick through & take! People really light up! Of course it is always interesting to see what they will choose when offered a wide selection! Bringing this tiny bit of happiness and crip joy to random strangers is also useful activism to do in daily practice.


