Wheelchair and Scooter Hack Day
The Hackability group met up at Noisebridge this weekend to work on modifying, maintaining, and otherwise hacking our scooters and wheelchairs. This first meetup was just 4 of us, Ian, Zach, Susan, and me. Ian and I talked first about projects we would like to do for his powerchair and my scooter. Susan is an engineer, inventor, and hacker who has some great ideas about improving power and making a regenerative braking system for my scooter. Zach came prepared to give us a really great talk which I’ll try to describe from my notes.
Zach made the point right at the outset that we can think of scooter hacking as falling under two categories. The first is for comfort and repair; things that are necessary. The second category is mods and upgrades; in other words, extra fun stuff. About comfort and repair: He talked about how long it took him to really listen to his body and pain levels and know what was irritating about his mobility devices, rather than accepting what he was given as “just how it is”.
For him, stability is an important factor. Parts wiggling on his scooter caused more pain for his back and legs, while rattling was distracting and annoying. He then took the seat off his scooter and I demonstrated my seating as well, to show how you can stabilize the seat housing pole. Mine was vastly improved simply by wrapping in a few layers of duct tape. Now, on the bus, my seat doesn’t wobble back and forth forcing me to use my low back muscles to cope with the sway of the bus plus the erratic seat motion. Many of Zach’s other mods were done with cheap and easy to find, objects like zip ties, heat shrink tubing, and blocks of styrofoam. He is a genius of finding free or cheap things to hack! His repairs look sturdy, neat, and durable. (Unlike my cardboard and duct tape repairs which are such a hot mess.)
He had recently put a bigger motor into his scooter frame. The motor heats up and has a fan to the side next to one wheel. Jacket sleeves, backpack straps, and other stuff was getting caught and tangled in it. Zach ended up replacing the fan with a blade from a computer’s cooling fan, and making a curved metal guard for it out of what looked like a thin plate of metal from a hard drive casing.
We digressed for a while into talk about batteries, their expense, how many amp-hours our batteries have, ideas about bolting extra batteries onto the side of my scooter and wiring them into the existing removable battery case. The lack of cheap smart chargers means that most people with mobility scooters have ineffective chargers which shorten the batteries’ life and effectiveness. My batteries, new in March, are already dropping in voltage output capacity even when fully charged, so my scooter is laboring going up hills or for any significant distance. Susan has plans to design an affordable smart charger. We’ll see how that goes! For more on batteries and charging, read up on Battery University.
MOving on to our second category of mobility device hacks: The fun extras. Zach showed us some of the cool stuff on his mobility scooter, like how his wire mesh basket is stabilized with a flat metal plate with screw holes and some hot glue. I suggested black latex paint might be a good alternative to hot glue, and may try that for my own basket, which squeaks annoyingly against its brackets. We talked about alternate handles for scooter grips and controls then admired Zach’s fancy lights. On the more simple DIY side of things, he has a small battery operated LED light meant for a bike, velcroed onto the side of his scooter dashboard. Advice: use the real Velcro not the dollar store kind! As a quite complex lighting hack, he has strips of LED lights which are wired into his scooter’s main power supply and through a homemade circuit board which steps down the power.
Another complicated hack we discussed was in building our cruise control switches and stabilizing the forward and reverse levers which make the scooter go. These levers on most mobility scooters use a non-precision potentiometer. The screw on these things goes out of whack, which can be very annoying.
I have to digress for a minute to explain scooters, or at least the scooters I’ve used and seen. They have levers on the handlebars which connect to a trim pot and the main power supply from the battery. The power also obviously goes to the motor. There are no brakes. There is a solenoid of some kind which stops the motor. There is no neutral gear so if the motor stops, the scooter stops. But there is also a printed circuit board in the mix which has “safety features” programmed in. In practical terms this means if there is any interruption or big fluctuation in the power supply, or you hit a huge bump in the sidewalk, or I don’t even know what else, the motor cuts off. When you start your scooter and the centering of the levers controlled by the potentiometer is just a little bit off, the motor won’t start. To adjust and fix the potentiometer’s screw, you have to take the entire plastic housing off of the scooter’s controls.
Anyway, Zach’s approach to this problem, from advice from our friend Jake who is a fabulous hardware/electronics hacker, was to add a 50K trim pot in parallel with the existing one. He placed it so that its screw faced outwards, and drilled a hole in the plastic casing so that he can adjust it with a screwdriver without taking apart the scooter. Brilliant!
His other mods include a USB charging port on the dashboard and a scooter-charging port also on the dashboard rather than low on the scooter frame. We ended up discussing charging a lot more, and what gauge of wire is necessary, but I don’t have good notes on that.
At that point we looked at Ian’s powerchair and discussed some of its features and problems. It is a much more complicated beast than a scooter, and a couple of orders of magnitude more expensive to buy and get repaired. Powerchairs have two motors controlling the wheels so that they can turn in place, while scooters tend to just have one motor, with forward and reverse. Powerchairs seem to have much more powerful batteries and have more complicated control boards hooking up the joystick or other single-hand control with the power supply and motor. Ian’s chair has a fancy color screen hooked up to the joystick control but it seems unhackable. Or at least not without risking ruining the chair’s software. It seems a shame that it is not easier to to software or firmware mods that we could experiment with and roll back the changes if the experiments don’t work out.
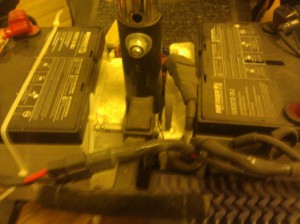
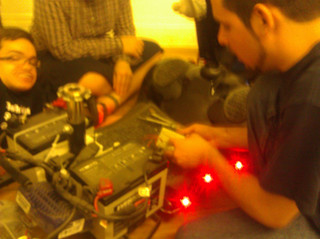
The thing we worked on was a power plug in the back of Ian’s chair. It is an Anderson connector and didn’t work, maybe from being shorted out, or maybe because it is wired wrong. We thought about cutting the wire and replacing the plug connector or reversing how it was wired. We took off the back plate of the scooter housing to see if there was anything obvious to do that wouldn’t mean we had to take apart the entire chair. Hooray, there was a fuse between the plug and the battery, and it was blown. Zach found us a new fuse from the many tiny parts bins in the Noisebridge hack shelves. Ian replaced the fuse and put everything back together. It tested out okay with the multimeter this time! But the plug that he wanted to use with it, which is a DC/DC power converter from an electric bike company, wasn’t wired the same way. We concluded it would be best to either buy a new part ($50) or cut apart the bike part to reverse its wiring to the connectors.
Thanks very much to the role playing game group in the other classroom who moved most of the tables out of the room for me before our meetup!
It was a great meeting with a mix of lecture, discussion, theory, and hands on practical demos and work. If you would like to join our mailing list, here’s the link: Hackability mailing list, for DIY hacking, modifying, and fixing existing wheelchairs, scooters, powerchairs, and other mobility or accessibility devices. If you’d like to come to our meetups in San Francisco, you are very welcome. Please join the list and let us know!


