Furminate her!

Had tea with yarnivore and friends yesterday during a weekend of rain, cold, and sick kids. I told her about the awesome, awesome book Home Life in Colonial Days and she talked about spinning. I can’t knit, as it hurts my hands too much, but am something of a knitting/textile/ravelry fangirl.

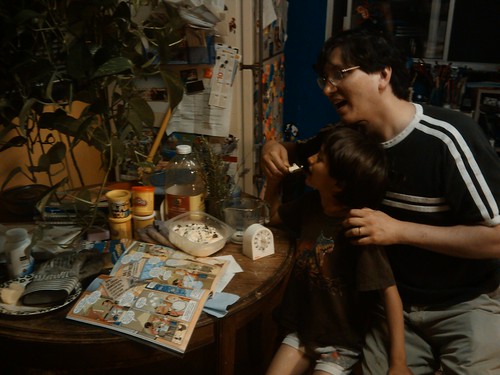
I suddenly remembered that I’d gotten the book Crafting with Cat Hair for Christmas and so demonstrated cat-combing using this tool called The Furminator, which sounds like something stupid I would invent but which works incredibly well, producing a huge amount of fluffy, sheddy, cat undercoat. It is best to furminate your cat while saying FURMINATE HER like Darth Vader, or FUR-MIN-ATE like a Dalek. Yarnivore astonished us by spinning several feet of cat hair yarn and then demonstrating how to ply it.

cat hair

Milo and I both tried hand spinning without a spindle. You pull your hands gently apart while spinning the fiber in one direction, which pulls the fibers from the undifferentiated wad of woolly stuff into a triangle called the draft, which leads into the twisted bit that is about to become thread or yarn. Fascinating! We talked about dyeing fiber with local plants like fennel and pokeberry. The thing that fixes the dye is called the mordant; alum sounds like an easy and cheap mordant. I spent some time poking around on Wikipedia to see what it has to say about hand spinning and yarn terminology. I love all the special terminology for textile stuff. Heddle, spindle, roving, batting, loft, worsted, woolen; all very beautiful middle-englishy words.

Yarnivore also told me about FiberShed which is a sort of consortium of Northern California fiber people who are trying to encourage local production of textiles from start to finish. Apparently they are trying to start a maker space and are hoping people in other areas will do the same. I thought again of Kevin Carson’s book The Homebrew Industrial Revolution and may take a look at it in the next few days.

So, I’m hoping to learn to spin with a drop spindle! Wool, though, not cat hair. Though I wonder if cat hair yarn would be as nice and warm as New Zealand possum yarn?

The joy of PVC pipe: Marshmallow guns!

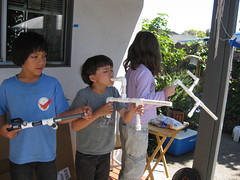
We made another Howtoons DIY project: Marshmallow Shooters out of bits of PVC pipe. It was so amazingly easy!

Marshmallow shooters

First Moomin and I made a list of the PVC parts we’d need. At the hardware store, we got a few 3 foot lengths of pipe, which was extremely cheap. We also bought enough slip connectors to build 2 guns, and as an experiment, I bought all the pieces to try making a threaded pipe gun as well. It takes a while browsing all the bins of parts to pick out the right sizes, in this case 1/2 inch pipe and connectors, and to make sure all the joints are slip joints, not threaded!

We bought a small, racheting, pvc pipe cutter for about 15 bucks.

When we got home we laid out the plans and started marking 3 inch lengths of pipe to cut. The pipe cutter was *definitely* easier than using a hacksaw!

The best bit of this was: I didn’t have to do anything but provide materials. All of the cutting and assembly was easily done by all the kids who made the shooters, from 5 years old up.

Then, Iz came over with a bag of mini marshmallows. She made a gun too. Onward to the great marshmallow shooting!

Marshmallow shooters from pvc pipe

Then our next door neighbor came over too. I had to give up my gun! While the threaded pipe made a decent gun, the parts were more expensive, so I’d just stick with slip joints in future.

Everyone wanted to modify their guns and make new things. So we went to the *other* hardware store, the local tiny one, to get more pipe and connectors and ice cream on the way… Pipe was a dollar for 5 feet so I bought 10 feet of pipe and another 10 bucks worth of various connecting bits!

We ended up making guns for all our neighbor’s small cousins too. So, if you do this project, I recommend you just buy about 20 feet of pipe and way more connectors than you think you’ll need! Everyone will want one! They shoot marshmallows all the way across our backyard, over the fence, and into the driveway over the cars. There were marshmallows all over the roof. It was epic! The only down side was, with the 90 degree weather we had a lot of melty splodges on the cars and sidewalk. Luckily the kids picked up most of the solid marshmallows, and our baby raccoons and probably some rats and possums took care of the rest by the next day!

I think next we may buy a lot more big lengths of pipe to make a huge “marble drop”.

Ice cream in a bag!

Moomin and Rook made Howtoons Ice Cream tonight in a couple of heavy-duty ziplock bags. The cream and eggs and sugar were in a small bag locked inside a larger bag of ice and salt. So, they wore welding and gardening gloves and threw the bag of ice back and forth for a while!

I had the idea to put the bag onto the bouncy horse (the kind on springs that little kids ride), which worked for a while. Standing next to it and bouncing the horse worked better than actually riding hte horse while holding a big wet freezing bag.

20 minutes later they put chocolate chips in it and voila, ice cream!

Howtoons Ice Cream

Things to do with rubber bands

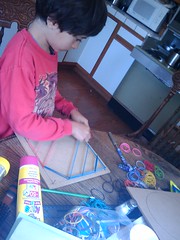
Moomin’s friend “Good Landru” has a toy that is basically a board with some nails around the edge and a bunch of different colors and sizes of rubber band. This is going to be my next craft project with Moomin. I ordered this to start with,

Rubber Band Ball kit

Which is nifty looking in itself and he might enjoy. Clearly it is just a big pack of rubber bands with instructions that say “Wrap these suckers around each other till they’re all gone” but unlike so many gimmicky toys, it’s cheap – only 4 bucks. So, I ordered it, it’ll come in the mail as a surprise, and then I can rummage around for a board.

***

rubber bands

We got the rubber bands! I still don’t have a board, but we made a great shoebox guitar and a sort of giant box-zither thing. I realized that Moomin doesn’t know anything about scales, or what a third is, or anything about music theory. He might like it.

My plan for the board is:

1 board about 1 foot square and maybe 1/2″ to 3/4″ thick
32 nails (I think finish nails will work best)

9 nails to a side, gives good scope for making complex rubber band patterns.

I’m not sure if finishing nails, with almost no head to them, will be best or not, so I might get a few other kinds for an experiment.

Anyway, I highly recommend a big bag of multicolored rubber bands – it has a lot of possibility for projects.

Watch out that your cats don’t eat the rubber bands!