How to bind an inside-out book
After looking at David Merritt’s little hand-bound recycled books I started trying various ways to make my own. Tollbooth Press books have ranged from xeroxed and stapled booklets to printed perfect-bound books to hand-sewn books with stiff textured Tibetan lokti tree paper covers and transparent inner leaves. This year I’ve made all Tollbooth’s books with recycled book covers in my experiments with cheap, no-fuss bookbinding.
I will explain below at length how to recycle and re-bind a book. But here’s the short version: Rip the cover off an old book, turn it inside out, and staple the new book inside it. It’s very easy!
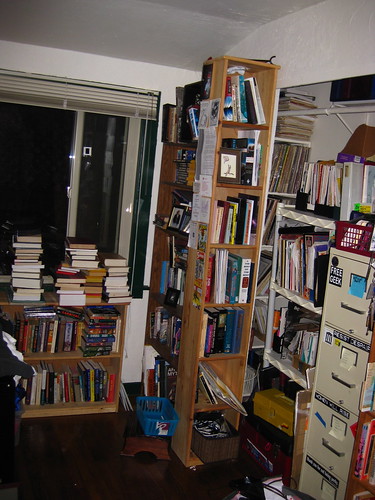
You will need some hardback books that deserve a merciful end. Self-help books from 1982, old business textbooks, third-rate airport novels, and tattered, foxed library discard reference books are excellent candidates for recycling. I get mine from the ends of garage sales, from the free shelves in my marina’s laundry room, from books being thrown out at Noisebridge, and from the free box outside Red Hill Books in Bernal Heights. As I often liberate books into the world by putting them into cafes and other free shelves, the net effect is more and better books in the free book ecosystem. It freaks some people out to think of destroying a book. But if you go to the dump or recycling center, you’ll find dumpsters filling up every day. How much better to give an unwanted book new life!
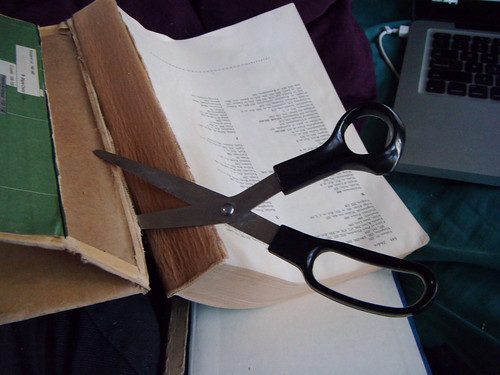
Anyway, to start binding a book, you must first cut up the old one.
Here’s the much more detailed how-to.
Take off the dust jacket if there is one, and open the book. Take a look at the hinge. You need to cut through the thick end paper which anchors the block of the book — its pages — to the boards, hinge, and spine, which form the book cover. The hinge will be hard to cut through, as it is probably backed with some of the net or mull that goes over the book’s spine, which you’ll see as a sort of cheesecloth fabric or little bits of threads. The trick here is to cut the block of paper out of the covers without cutting through the spine. If the book is tightly bound, it will help to widen and try to tear the endpaper’s connection to the boards.
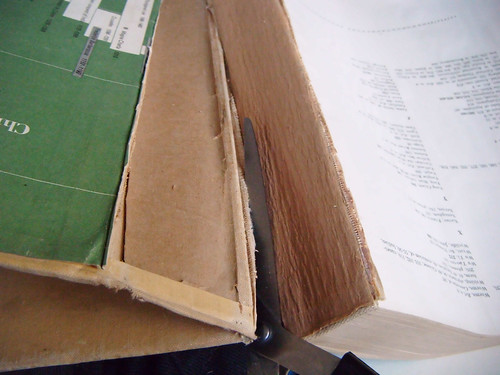
Now you have the boards and spine and hinge as the sort of shell or husk, separate from the block of pages. Tear the end papers off the block and tear out or clip anything else interesting in the book. You might want to use them later for new endpapers or decoration.
Turn the book cover inside out. Work on the spine to make it flexible, by creasing it in all its parts in its new direction. I like for the new book’s spine to be rounded and flexible, not pointy and cracked. The papery inside bits of the inside-out spine may tear and flake off. That’s okay. The entire aesthetic of the book can be messy.
You will need to make your own block of paper now. For a blank book, this is super easy. Get some paper and trim it to a size to fit inside the inside-out book cover. The paper should fit fairly snugly up into the new inside-out spine. You may want the edges of the paper to be perfectly trim with the book, or to protrude outside it like lacy petticoats peeking out of a dress, but in the traditional way to bind a book you’d trim the pages to be shorter than the covers all around, so that they fit inside without showing. It’s up to you. Trim the paper, and then staple the left edge together in two or three places, with about a 1/8 to 1/4 of an inch margin. If your book is thick, you can use a heavy-duty stapler. A normal stapler binds about 20 – 25 sheets of paper. If you don’t have a heavy duty stapler, then staple around 20 pages together, then lay the next 20 pages on top and staple again in a slightly different place in the margin. Repeat as necessary and stagger the vertical placement of your stapler. Now you have a book block!
If you have your own text to bind, you’ll need to lay it out nicely. The most important things in your layout are the margins. You need the text to fit on the page, and it’s especially nice to plan for a wide inside margin so that the text doesn’t unreadably run into the binding of the book. Since you will have a fairly random assortment of book cover sizes, it’s hard to make your layout precise. But there are two standard sizes I encounter. The bigger size is 9 1/4 x 6 1/4. The medium size is 8 1/2 x 5 3/4. The very large, very small covers and the ones wider than they are tall, it’s best to save for blank books or one-off projects. If you lay out your books for the big and medium standard sizes, with generous margins, that will work well. Trim the pages to the size you need, book by book, with scissors, exacto knife, or a paper cutter. Or take them to a copy shop and ask for them to trim a giant block of pages all at once. This is usually inexpensive.
Tall, thin children’s books or coffee table art book covers make great drawing pad blank books for kids. You can make one in a minute or two before you go on a trip or to anywhere you might need to entertain some children and keep them quiet. I’ve spent hours drawing and telling stories with various children in blank books.
To make really nice feeling books, buy special paper. I love to go to Kelly Paper and browse around. Check your local paper store and its shelves of discontinued paper if you’re looking for a discount – you can get a $30 ream of paper for $5 if you’re lucky. Bond is smooth and the most basic bond paper is what you usually put into a printer or copier. Laid paper has some texture to it with ribbed lines. Wove is smooth, but has more of a square weave pattern than bond. Vellum is usually smooth too but has a bit of translucency. Linen basically looks how it sounds – like fine cloth you might use for sheets, with some tooth (finger-detectable rough texture) to it. I like linen or laid in a hand-bound book, and think that vellum makes great semi-transparent title pages or fly leaves.
You now have a block and a cover (inside-out). Hold the block tightly inside the cover and staple the hinge with the book facing up. A line of three staples down the book’s spine is probably enough. Flip the book over. Did the staples go all the way through? If so make sure the points of the staples are not protruding too sharply – fold them over with a screwdriver or a butter knife. If the staples didn’t make it all the way through the block and back cover, then put in another three staples from the back side.
Note that the spine has a hinge and, before the stiff boards start, an indentation called the gutter. You can staple close to the boards, right in the gutter, but I like to staple just a bit behind the gutter so the book cover lies nice and flat.
You can also wedge the book block tightly or more loosely into the spine before stapling. A tight fit works well for thin books but for thicker books, leave some room for the spine to curve and lie flat when the book is open. Here you can see a detail of the stapled inside-out spine of the new book. The torn edges of the original endpaper and bits of mull stick out in a pleasing feathery way. The

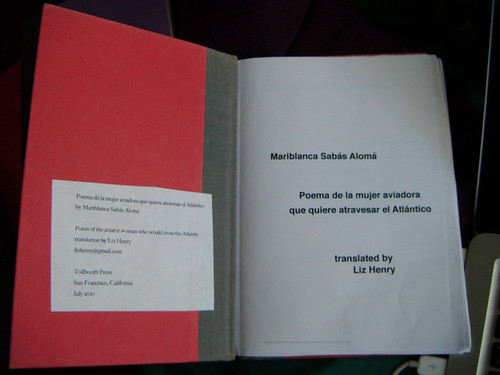
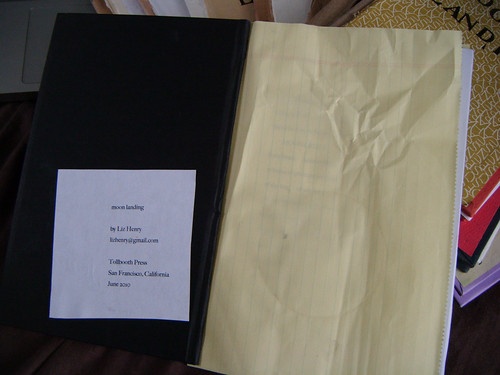
You may want some front matter on the inside cover of the book rather than bound into the pages. Right now I’m gluing printed paper into the front inside cover with the name of the press, an ISBN, and the date of publication. I think that standard stickers would work well for this, better than glue, with a blank spot for the month and year to be stamped or written in.
For some books, I glue fancy endpapers from the book cover’s inside to the first (blank) page of the text block. This can look really nice but is a bit laborious. It is important to use nice, archival-quality, acid-free glue if you’re going to do this, or the book will yellow and rot in a few years.
For the front cover, you can print labels and glue them, handwrite, use stickers, or print with rubber stamps and ink. You can custom order rubber stamps with a title from most office supply stores, very cheaply. I’m copying David Merritt here, in part, by using alphabet block rubber stamps for the front cover. But the title of the poem here was too long to stamp out, so it’s a printed label.

My alphabet rubber stamps were about $15 at an art supply store that had a scrapbooking section. They came in a neat metal box with a small ink pad. You can also get them at craft and sewing stores or order them online in various fonts. The metal box doesn’t absorb the extra ink from the stamps, so I’m going to look for a wooden box or a thin wooden shim to put under the stamps. While I don’t mind getting inky in the process of bookbinding, the metal box is out of control! The box is super handy, though. I keep an exacto knife in it for help in cutting up book covers. I’ve also thought it might be interesting to modify a small, thin briefcase or some cigar boxes to hold alphabet stamps neatly like a printer’s type drawer.
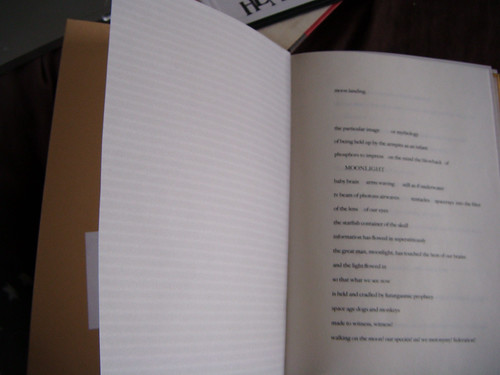
Here are some examples of experiments with flyleaf paper in books with a single poem.
Thin, stiff, translucent striped paper:
Rumpled, hand-torn yellow legal paper:

Flyleaf of rumpled yellow legal paper with a coffee mug stain:
Finally, here is an afternoon’s book binding result. I can do a batch of about 10 or 15 books from start to finish in a couple of hours. I generally give them away to people but am not above taking a dollar or five from people who want to donate.

Once I print out some texts and put them in folders, the whole “small press” is portable. The folders of papers, extra end papers and blank sheets, stapler(s), glue, scissors, exacto knife, rubber stamps, and ripped-off book covers, all fit neatly into a backpack. At home, I have a saddle-stitch stapler and a heavy-duty stapler for big projects. For the portable press-in-a-backpack, a tiny stapler works fine.
Enjoy your bookbinding projects! I hope you create marvelous and satisfying books!