How to make a coronavirus piñata
I bet you would like to BEAT COVID-19. And here is one way! Make your own coronavirus piñata and (safely socially distanced, masked, outdoors) hit the piñata until it is DEFEATED!
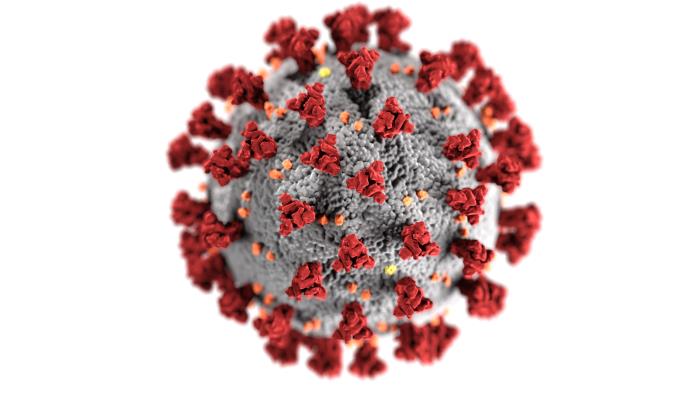
All the diagrams of the shape of the virus that I’ve seen have a round shape with at least 3 different sizes of “protein spikes” coming out from the middle, with each kind being a different height. Each spike has an extra bit on top like a flat top or a sort of flower shape. This is not too hard to make, but doing the “protein spikes” was a little bit of a challenge.
Here’s one model I looked at, from the CDC:
Here’s how I made a coronavirus piñata, in some detail! I am putting in all the details, because, while I grew up making piñatas I realize a lot of people did not or they bought their piñatas from a store. It’s so much fun to make them because the multi-day process builds up anticipation.
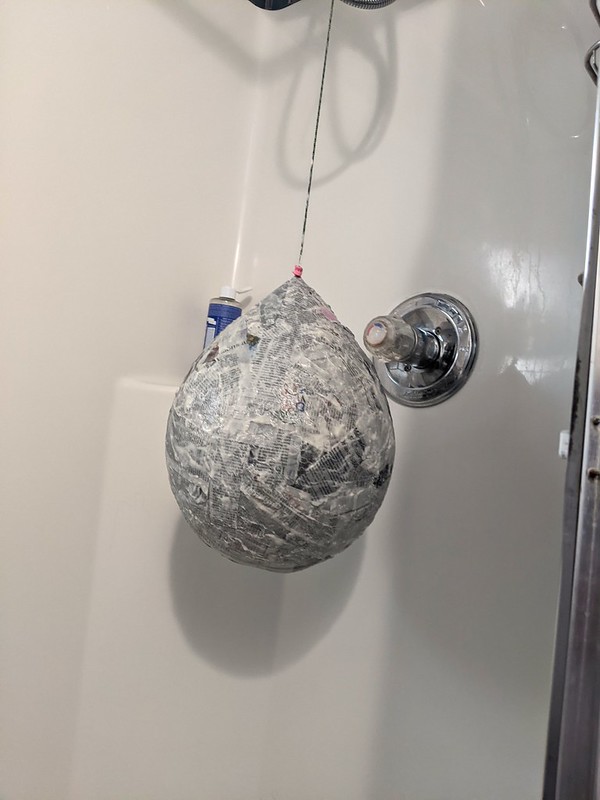
Make a standard piñata shell over a large balloon.
(You can also use a plastic or paper grocery bag stuffed with paper or other bags to make the shape – the important thing is, you have to be able to pull all that stuff OUT of a small hole.)
You will need:
- about 3-4 days
- a round balloon
- flour
- water
- a bowl
- a newspaper
- some twine or strong cord
- somewhere to work
- black paint
- regular school glue
- thick cardstock or thin cardboard, two or three pieces
- paintbrush (or your fingers)
- scissors
- red, orange, and yellow rolls crepe paper (or colors of your choice)
Preheat oven to 350 degrees NOOOOOOO I’m joking. Never put your piñata in the oven. It will catch on fire. Very bad idea!
Mix a bowl of warm water and some flour to make a thin, soupy paste, beating out all the lumps. Tear some newspaper into long strips a little less wide than the space between two fingers (so that you can efficiently use your fingers to strip the paste from the newspaper).
Set up a place where you can make a mess. It helps to have either a place to hang the balloon on the cord from somewhere that puts the balloon at your working level, or, you can perch the balloon on a tray or on top of a cooking pot.
Tie the cord to the end of the balloon, leaving a long piece to hang the piñata, and about 6 inches or so on the shorter end, to build into your paper mache base.
This is going to make a big mess!
Now, take a strip of newspaper, carefully dip it into the flour and water, and use your fingers like a squeegee to strip excess paste from the newspaper. This takes a delicate touch because when the paper gets wet, it will break easily. Now lay the paper across your balloon. Repeat this until the balloon is covered with 1 layer of paper. Leave a hole near the top to put in the candy, decorations, and prizes!
Hang the piñata to dry. If you have a space heater you can put it nearby. Otherwise, it will take at least a day to dry out.
Wash your bowl and work surface quickly so the paste doesn’t dry into glue!
Once the shell is dry I do recommend you add one more layer. Unless your piñata is for very small children – in that case one layer might be okay.
Repeat everything to add another layer of paper!
Hang the piñata to dry again. (And, now, you can pop the balloon if it hasn’t popped already!
It does not matter if your piñata is not perfect, or it’s lumpy, or a weird shape. It will still look amazing once you cover it with paper, and you are going to break it anyway!! Don’t worry!
Look how ugly it is! But we have no worries.
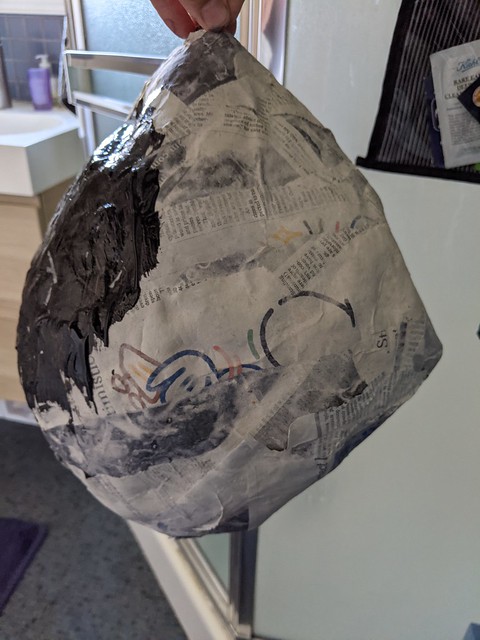
(I am leaving out the part where I hung the piñata outside in the sun to dry, then forgot about it. Raccoons came in the night and slashed it open, so I had to add some repairs and dry the shell again before I painted it. I recommend you skip the step with the raccoons. Again – do not worry about any little imperfections, such as a raccoon invasion, or that your virus is not a perfect sphere.)
Now you have some choices. Normally I would wrap the piñata around and around in overlapping layers of frilly crepe paper, but for this coronavirus effect, I painted the balloon shell instead. I thought black would hide any imperfections in the shape and would make the color of the protein spikes stand out more beautifully! I used washable tempera paint that cost about 3 dollars for a 16 oz container. The paint dried in a couple of hours when I hung the piñata near a space heater. Otherwise, expect it to dry overnight.
Now you are ready for the decorations!
Take your roll of crepe paper, and stick the scissors into it so that you are cutting a fringe about 1/3 of the way through several layers of paper at once. This next picture shows what that looks like, with a sneak preview of making it into a tall spike shape!
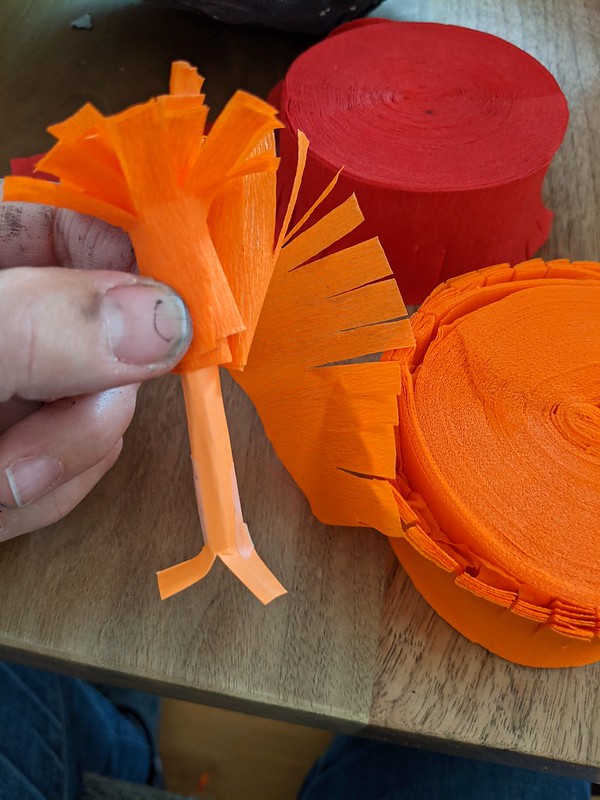
You can’t cut too many layers at once, just cut a few, then make some decorations, then when the fringed part ends, cut some more fringe into the roll.
To make the spikes, I had two requirements. One, they have to be strong enough hold the “flower” fringes of paper up high at two different heights. And two, I have to be able to attach them firmly to the piñata base. But how to do this? (Tape will not work!)
I happened to have thick colored cardstock in bright yellow and orange, the same color as the crepe paper I bought. But, my original plan was to use plain white cardstock or strips of a thick cardboard box, painted black. Construction paper might work if you roll it into a tube with several layers. Another idea, you could use paper or plastic straws.
So, using my cardstock (#60 thickness I happen to know) I cut out rectangles and taped them into small tubes about the size of a drinking straw. Then, cut the base of the tube 3 times to give 3 flanges to glue onto the piñata. If you look back at the photo above you can see the tube and two visible flanges.
Then, I wrapped the fringed crepe paper around the other half of the tube and taped it into place. Spread out the fringe to make the flat, carnation-like top of the protein spike for our virus!
Then glue the spike onto the piñata and hold it for a moment for the glue to stick. This took a couple of hours to make all the tall spikes, then the medium spikes.
Here is a picture of this phase of construction. In it, you can see that my shape is not perfect, the paper is very lumpy, and the paint job is not very good. None of those things mattered – You are not building something perfect; you are building a PARTY.
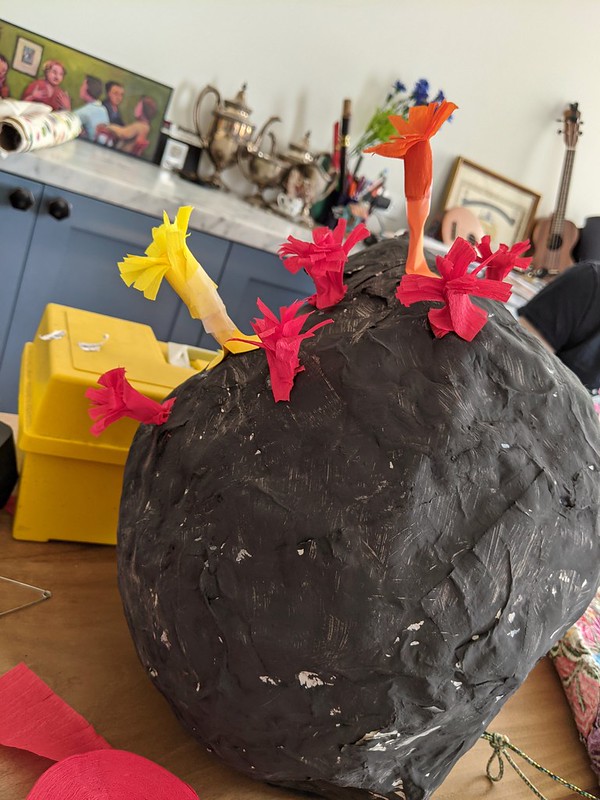
The most numerous spikes are the short red ones, much less work. For those I just used the base of the crepe paper, cut into flanges, and glued them directly to the piñata base.
Things got tricky because the glue does not hold quickly enough to stop the taller spikes from falling off, unless they are at the top of the sphere. So I had to keep turning the piñata and carefully propping it up, without squashing the spikes.
Maybe you will think of a better way to do that! Or maybe you will have better glue!
But, while I am working on it, it’s so peaceful and meditative. I’m thinking of the vision of the finished object, and also thinking with love of the event and the people I will host and how they will be astonished by the ridiculousness of this project and the ephemeral nature of ritual celebration and destruction ! We will BEAT the CORONAVIRUS! Together! With joy and love!! And from it, somehow, we will extract ABUNDANT GOOD THINGS even if those things, when not metaphors, are little bottles of hand sanitizer and chocolate bars and “crispy fruit” packets from Big Lots!
It reminds me of my favorite poem by María Eugenia Vaz Ferreira about ephemeral things!
You must put all of that love into your piñata making. It is very important!
Back to construction: I think you could go faster by having one layer of the spikes be nearly flat to the surface, then the crepe-paper height layer, then only one layer of “tall” spikes on straws or other tubes. But, your finished product might lack a little bit of panache.
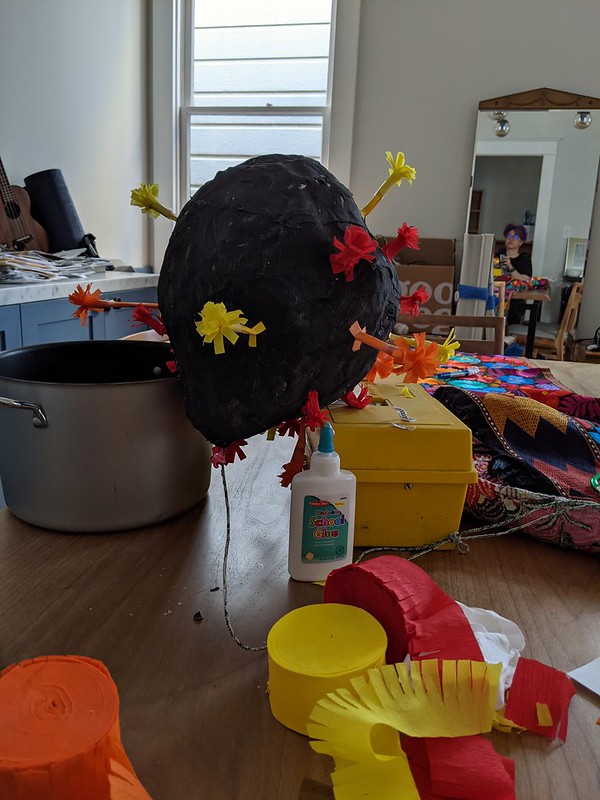
Once you’re done gluing, let your spikes dry for some hours. Then carefully stuff the piñata with candy or prizes and some crumpled remains of the crepe paper as filler.
Oh! It’s almost done now!! But after taking this photo I added more spikes because I noticed a big empty spot!!
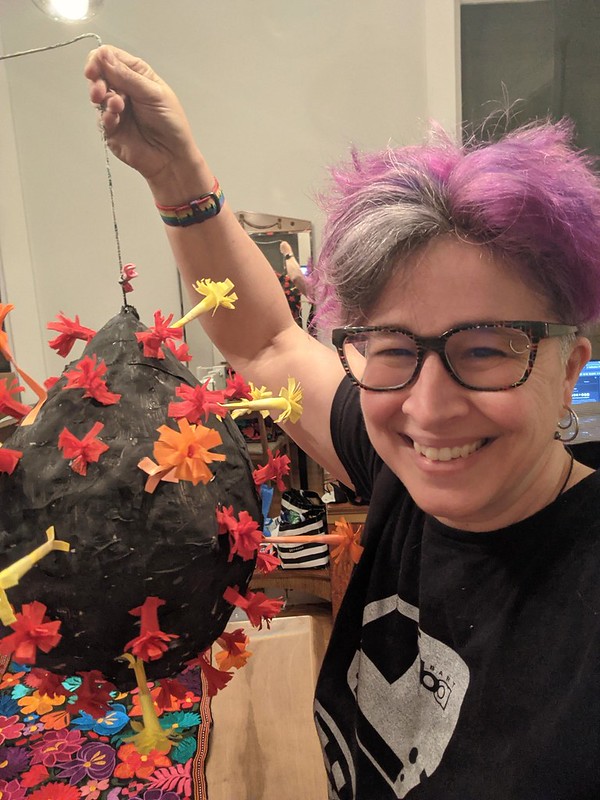
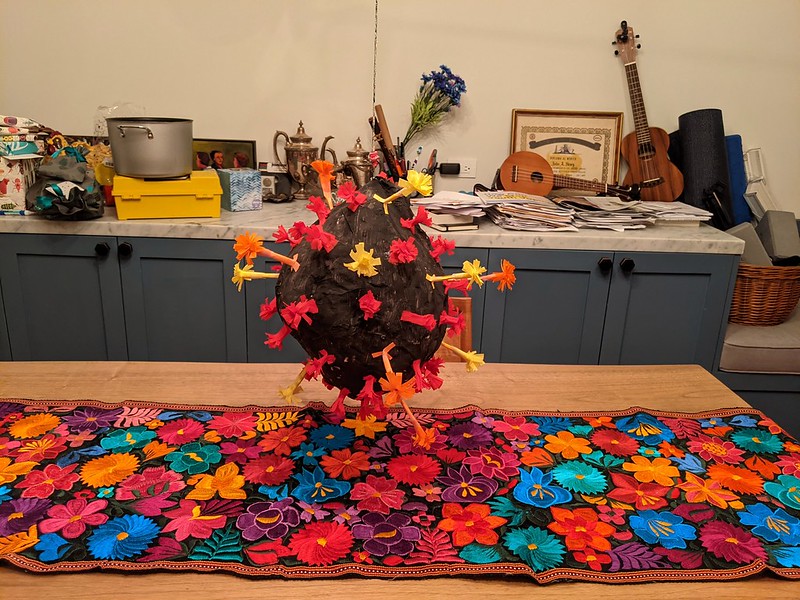
Look how beautiful it is when finished, despite its asymmetry, my sloppy paint job, and the raccoons! So festive! (At least, it is beautiful to me, after so many hours.)
Hang it up, play some music, and take turns ceremoniously beating it with a stick!
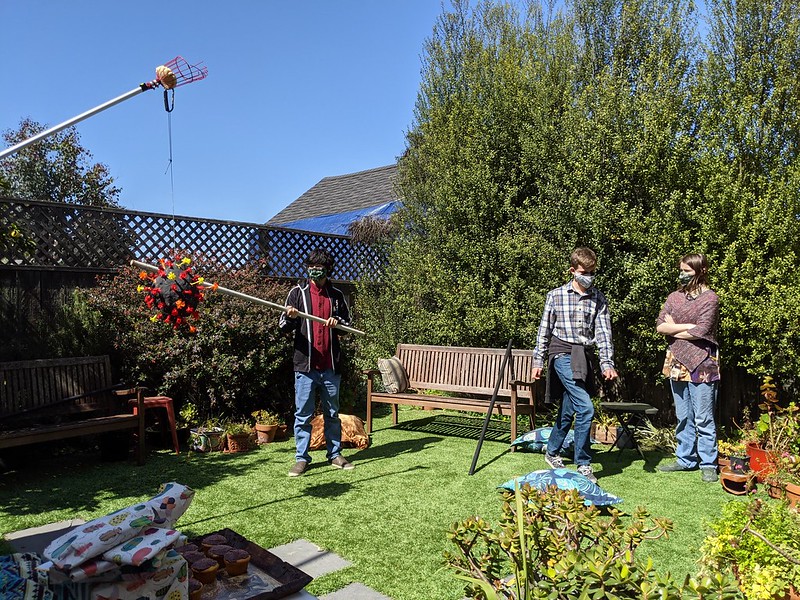
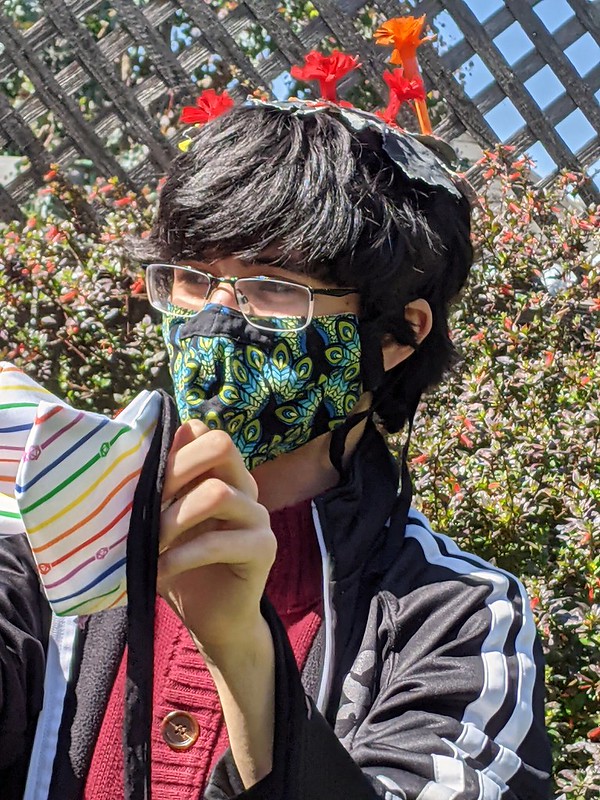
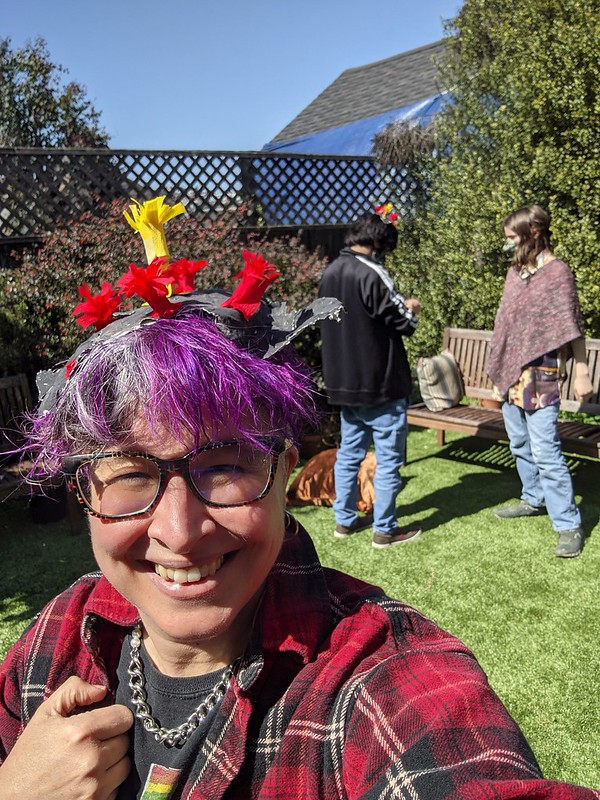
It turned out that the pieces of the broken piñata were the perfect shape to make attractive hats.
Have a good time! And if you make your own covid-19 piñata please show me the pictures!
P.S. HAPPY BIRTHDAY to my FABULOUS SON!!!!! <3